

In this guide, we’re going to show you how to add M5Stack CardKB Keyboard into your current ESP32 Lora Meshtastic Node setup. This process can be adapted for other ESP32-based devices with a few tweaks. By adding a keyboard to your node, you’ll transform it into a fully independent unit. Now, you’ll be able to send messages and even control some functions (though support may be limited) directly from the node itself, without relying on a phone. Let’s get started!
Meshtastic DIY – How To Build Your Own Meshtastic Node ESP32 & Lora Radio
“Create your own Meshtastic LoRa Node with our easy DIY guide. A complete step-by-step for building your customized mesh communication system.

Hardware
Now let’s get started with the hardware you need:
📢
When ordering from AliExpress, consider consolidating your purchases from a single seller to maximize savings. For instance, if you’re purchasing an antenna from seller X, check if they also offer an IPEX to SMA-K cable. By sourcing all your items from one seller, you can significantly reduce shipping costs.
Assembly
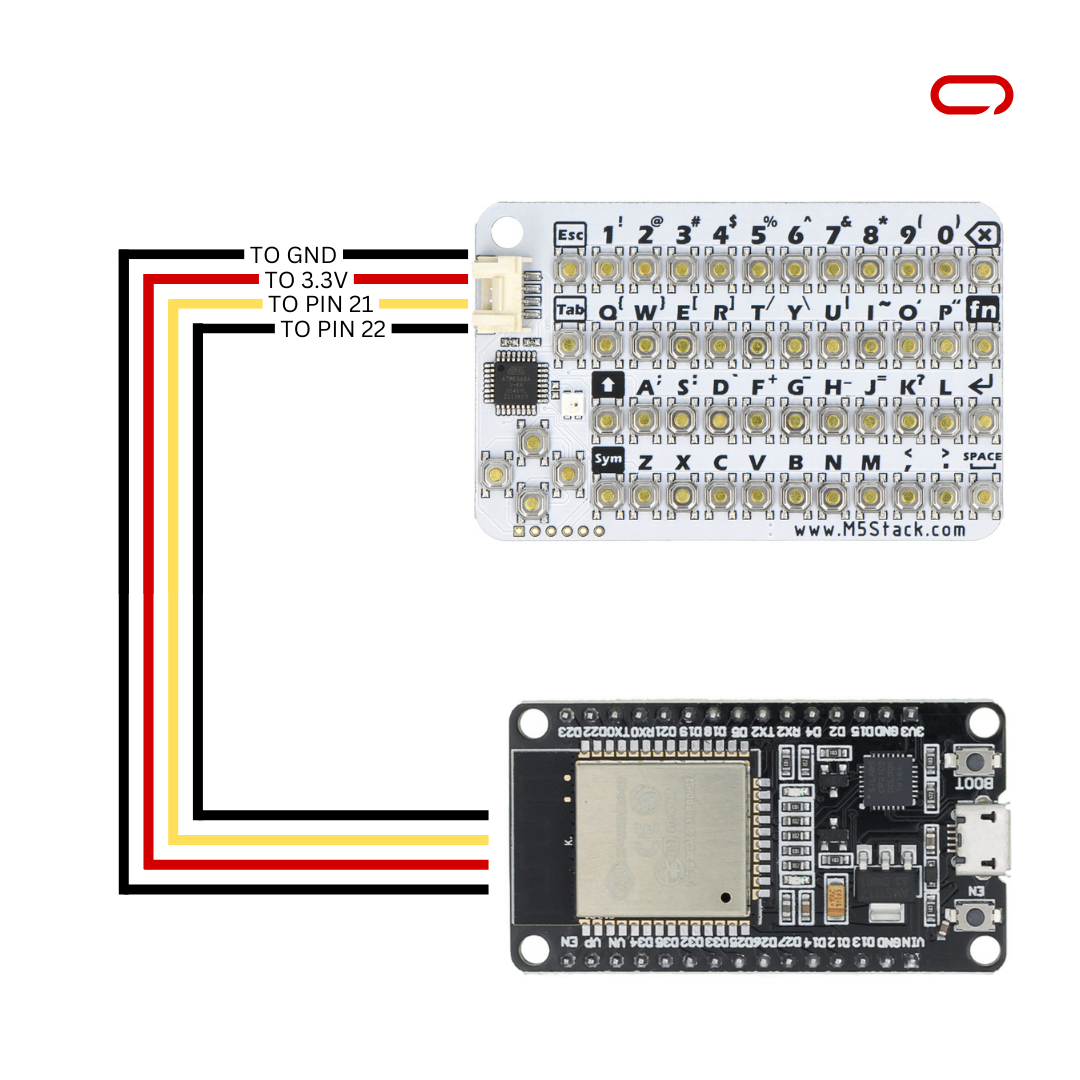
Now that we have all the hardware ready to go, let’s dive into the wiring. To ensure compatibility with all Meshtastic devices, we need to understand the wiring diagram for the CardKB. After connecting the cable (HY2.0-4P) to the connector on CardKB, we will cut off the other end and solder female headers to it or you can use the naked cable to be soldered directly to your board. The CardKB comes with a connector featuring four cables: Black for Ground, Red for 3.3 volts, Yellow for SDA, and White for SCL. With this knowledge in hand, we can easily adapt the CardKB to work with any Meshtastic device. We need to locate the SDA, SCL, 3.3 volts, and Ground pins on our board. Once we’ve identified these pins, we can connect them to the corresponding cables from the CardKB connector. This ensures that the communication and power between the CardKB and our Meshtastic device are properly established.
M5Stack CardKB – Heltec V3 Lora ESP32 Meshtastic Node
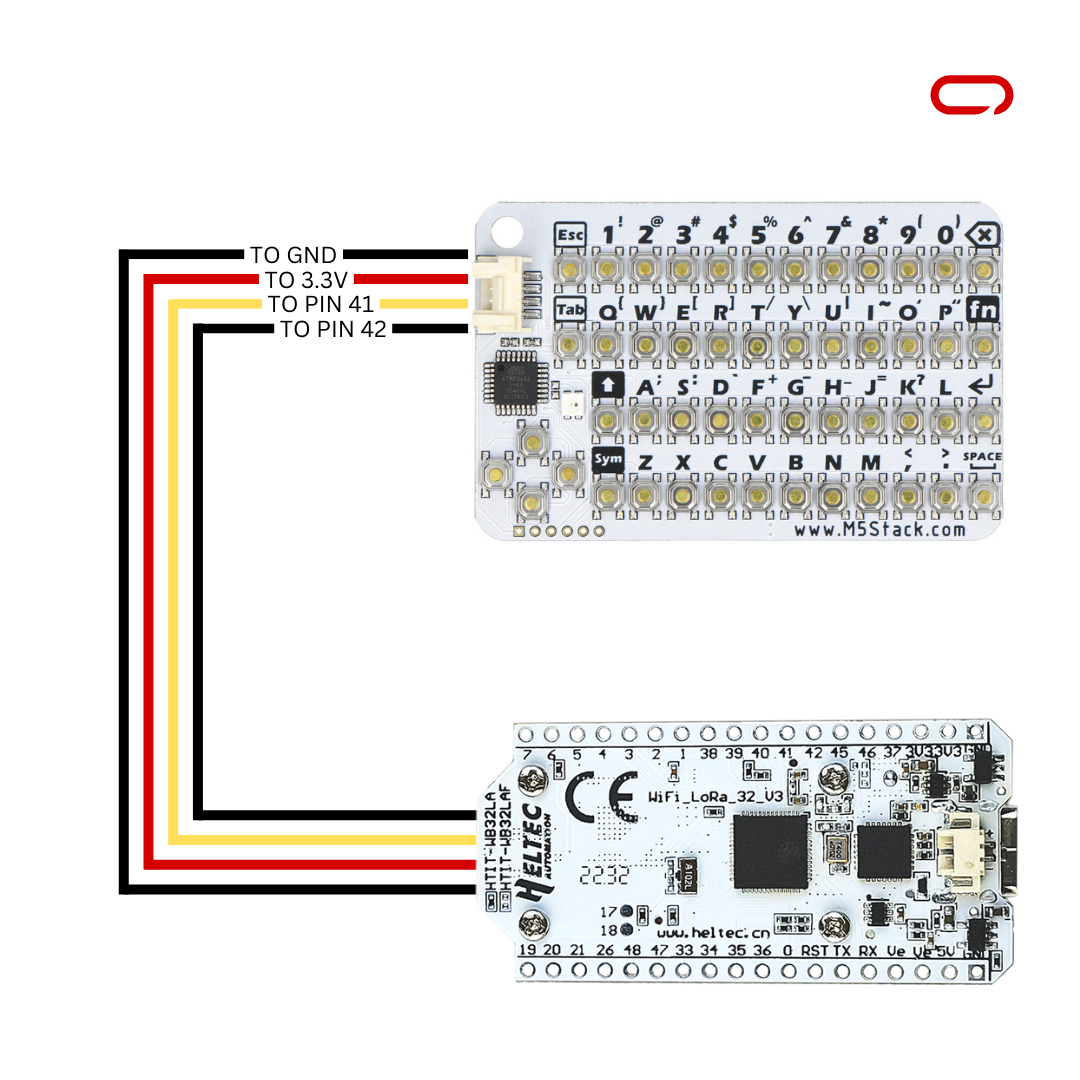
- Black -> GND
- Red -> 3.3V
- Yellow -> Pin 41
- White -> Pin 42
M5Stack CardKB – Lilygo T-Beam Meshtastic Node
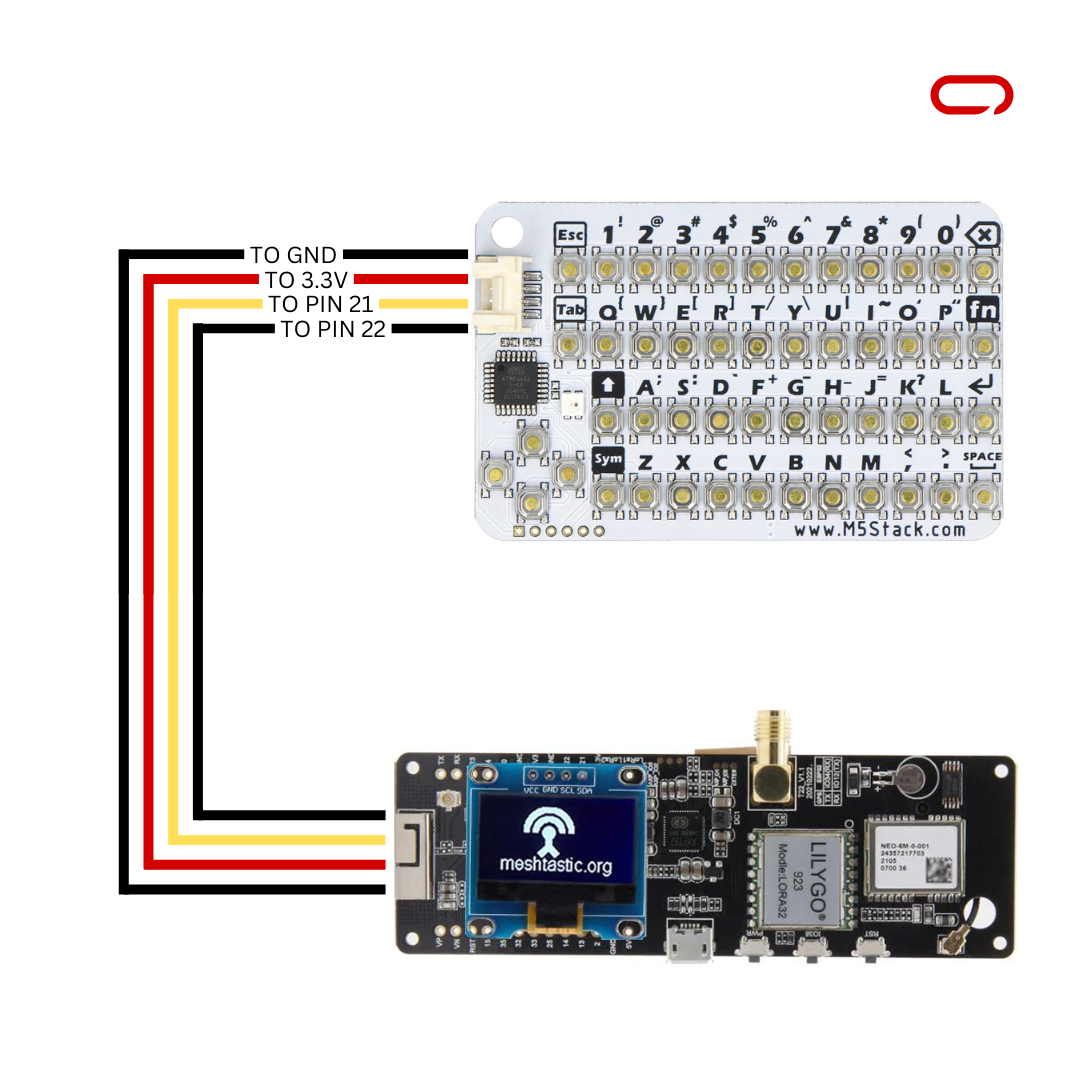
- Black -> GND
- Red -> 3.3V
- Yellow -> Pin 21
- White -> Pin 22
M5Stack CardKB – Lilygo TTGO Meshtastic Node
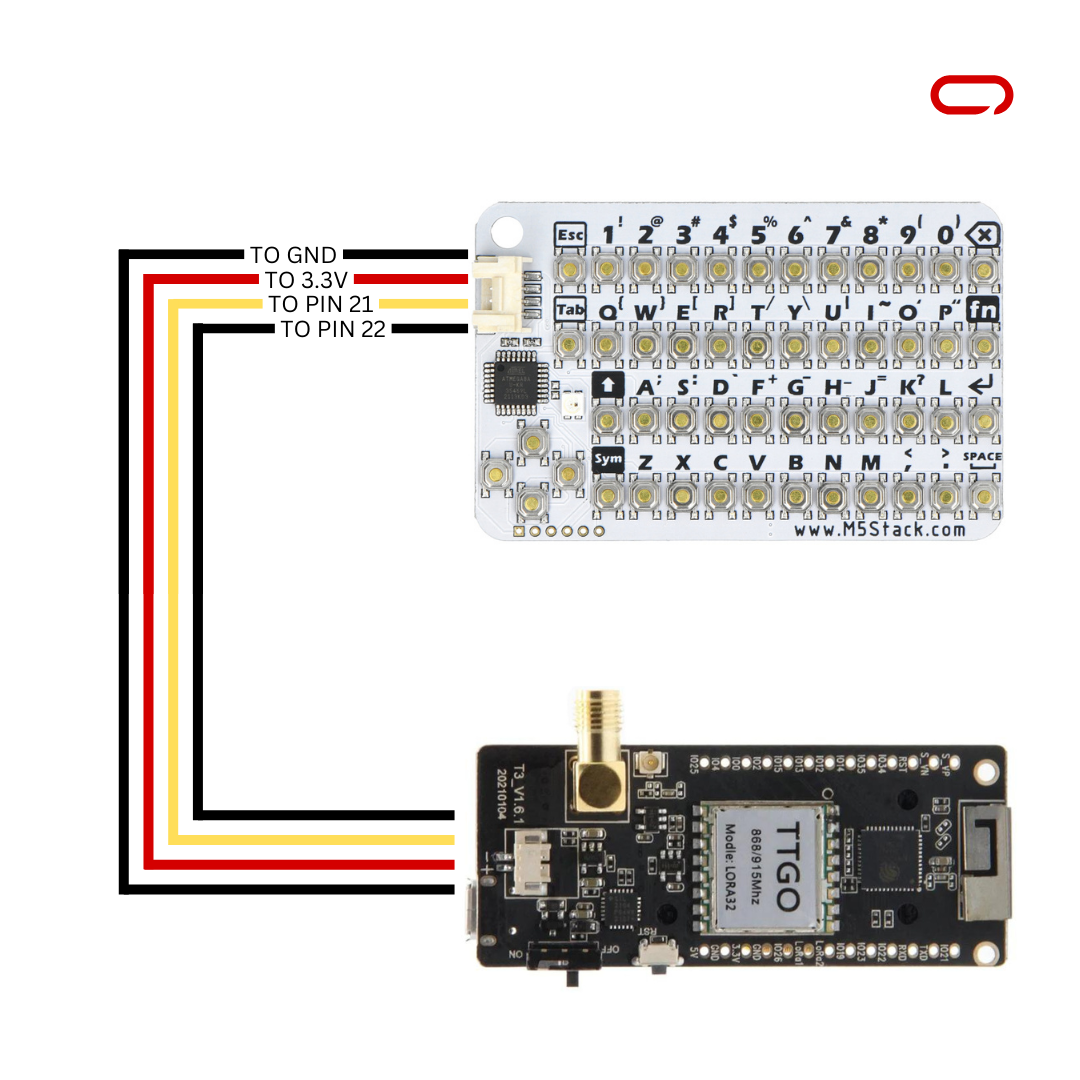
- Black -> GND
- Red -> 3.3V
- Yellow -> Pin 21
- White -> Pin 22
M5Stack CardKB – DIY ESP32 Meshtastic Node
- Black -> GND
- Red -> 3.3V
- Yellow -> Pin 21
- White -> Pin 22
💡
If you’re using a different ESP32-based board, simply find SCL (White) and SDA (Yellow) on your board. Then, follow the guide using the chosen pin, disregarding the specific pin number mentioned in the instructions
💡
Capacitors are good practice for decoupling one part of a circuit from another
Once all the wiring is completed. Double-check your connections and ensure they match the suggested layout before proceeding to the next steps.
Meshtastic Settings
On the Sensor Device
- Open Meshtastic App (IOS for this guide)
- Go to the Settings page
- In the Module Configurations section navigate to Canned Messages
- Enable Canned messages.
- On Configuration Preests droplist choose M5 Stack Card KB
- Lastly, press Save
💡
When you power up your node for the first time, you might see a message saying “Canned Message Module Disabled.” Don’t worry, this is normal. Simply press the reset button, and your node should boot up properly. After that, you should be able to start typing without any issues.
Once you’ve completed the setup, you’re all set to dive into the convenience of typing and sending messages directly from your node. No more relying on external devices or smartphones; with the addition of the M5Stack CardKB Keyboard, your node becomes a standalone communication device.
In conclusion, by adding the M5Stack CardKB Keyboard to your Meshtastic Node, you’ve unlocked a new level of independence and convenience in your mesh communication system. With just a few simple steps, you’ve transformed your node into a fully standalone device capable of sending messages and controlling functions directly, without the need for a phone or other external devices.